Self-registration pages
Set up self-registration pages so visitors can register themselves before they arrive onsite. This is useful when you want to share a link for a specific site and visitor type.
Quick links
Benefits of self-registration pages
A self-registration page gives you a link you can share, so visitors can submit their own registration details ahead of their visit - useful if you want visitors to pre-register, but don't have all their details.
Each page can be linked to:
- a specific Site
- a specific Visitor type
- an optional Landing Page with a customised welcome message
Use this when:
- the page is intended for contractors only
- the page is intended for visitors only
- you want to stop public users selecting internal categories
Create a self-registration page
-
Click Create Page.
-
In Url, enter the short URL ending you want to use.
-
Select the Site the page will belong to. If no site is selected, the visitor can self-select this when they register.
-
Optionally, select the Visitor type the page will be used for. If a visitor type is not selected, the visitor can self-select this when they register.
-
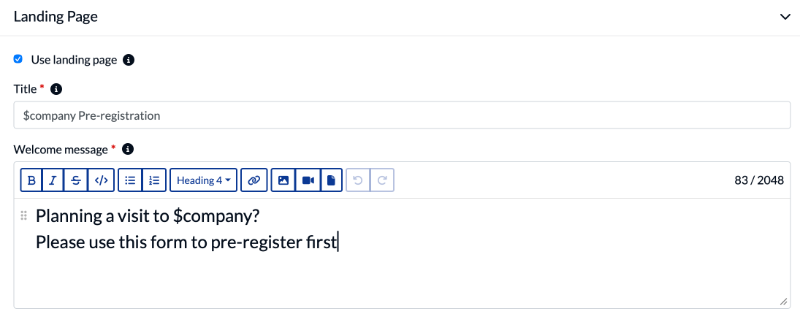
Select landing page if you want something custom to show before the pre-registration process, for example:
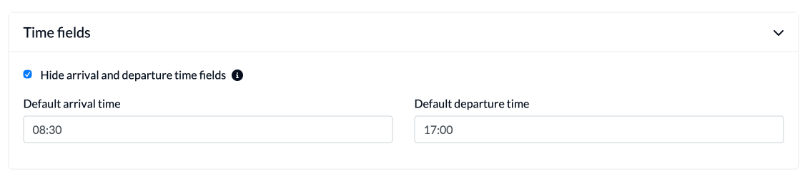
- Select Hide arrival and departure time fields if you prefer a default value
Configure the landing page
Use the landing page if you want visitors to first see a welcome screen before they continue with registration.
-
Expand Landing Page.
-
Select Use landing page.
-
Enter a Title.
-
Enter a Welcome message.
You can use your own wording in the title and message, and use $company and $site (if selected above) as placeholders.
Configure time fields
Use this section if you want EVA to apply preset visit times instead of asking visitors to choose them.
-
Expand Time fields.
-
Select Hide arrival and departure time fields if you do not want visitors to see those fields on the page.
-
Enter a Default arrival time.
-
Enter a Default departure time.
Manage existing pages
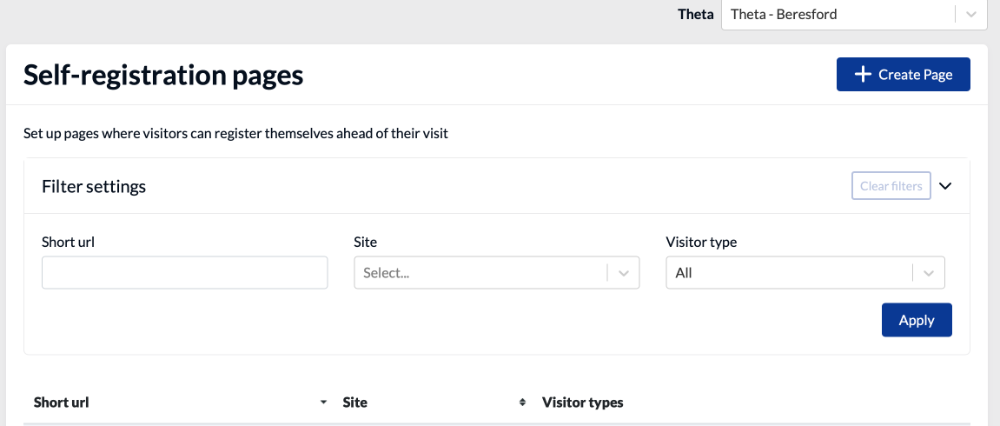
On the Self-registration pages screen, you can filter and manage existing pages.
Filter the list
Use Filter settings to narrow the list by:
- Short url
- Site
- Visitor type
Click Apply to use the filters, or Clear filters to reset them.
Actions available for each page
From the page list, you can:
- open the self-registration page
- copy the page link
- edit the page
- delete the page
Tips
- Use a short, clear URL ending so the link is easy to share.
- Create separate pages for different sites or visitor types if you need different registration experiences.
- Use the landing page to explain what the visitor needs to do before arriving onsite.
- Hide time fields when visit times should be controlled by your team rather than chosen by the visitor.