Kiosk setup
Learn how to set up and update an EVA check-in kiosk on your iPad or Android tablet.
In this article
How do I set up the Kiosk app on an iPad?
- Make sure that your iPad is on iOS 15.6 or above
- Download our kiosk mobile app for iPad from the App Store
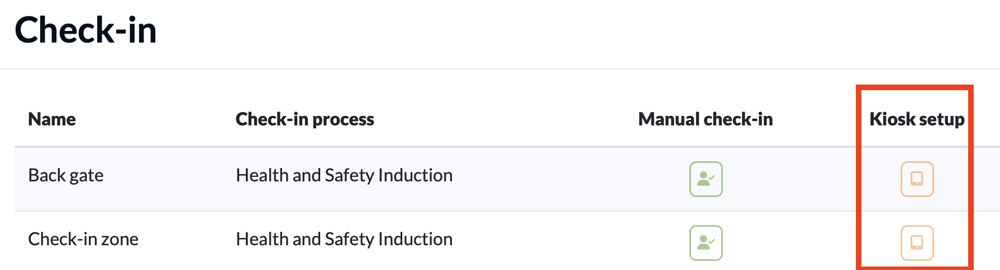
- Connect the kiosk - get the ID and token by clicking the kiosk icon on the relevant check-in zone in the EVA Check-in portal and add these details to your app
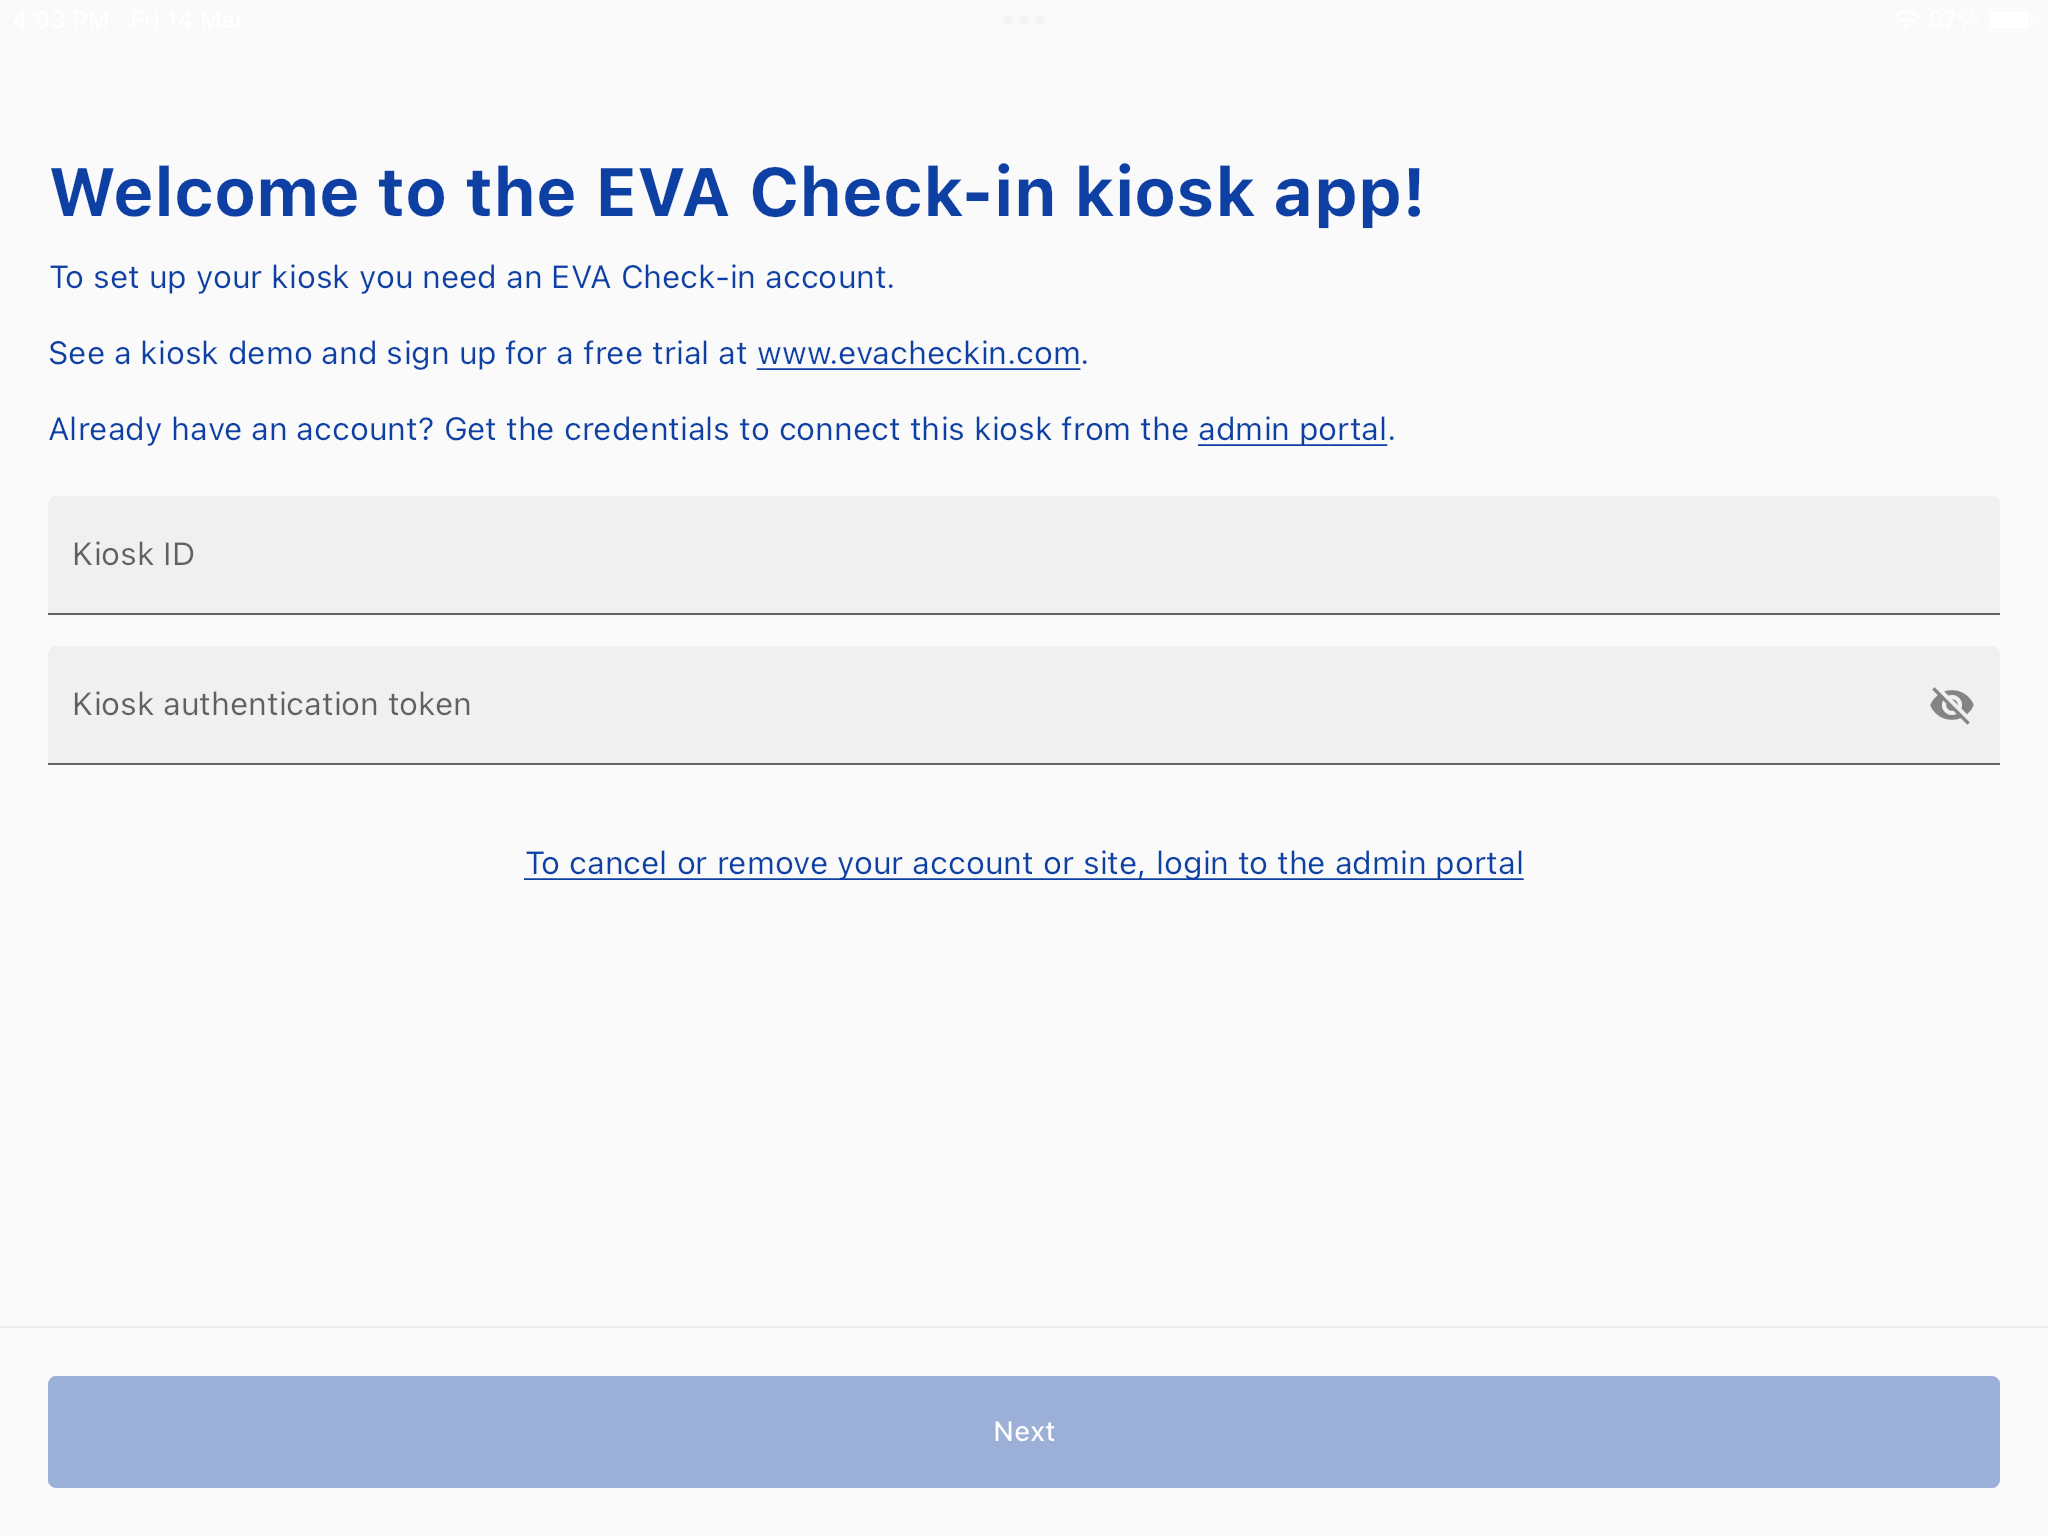
- Click Next
- Choose your kiosk device settings.
- The only compulsory setting is a device name.
- Others relate to the camera (required for visitor photos, and scanning badges and passes) and label/badge printing
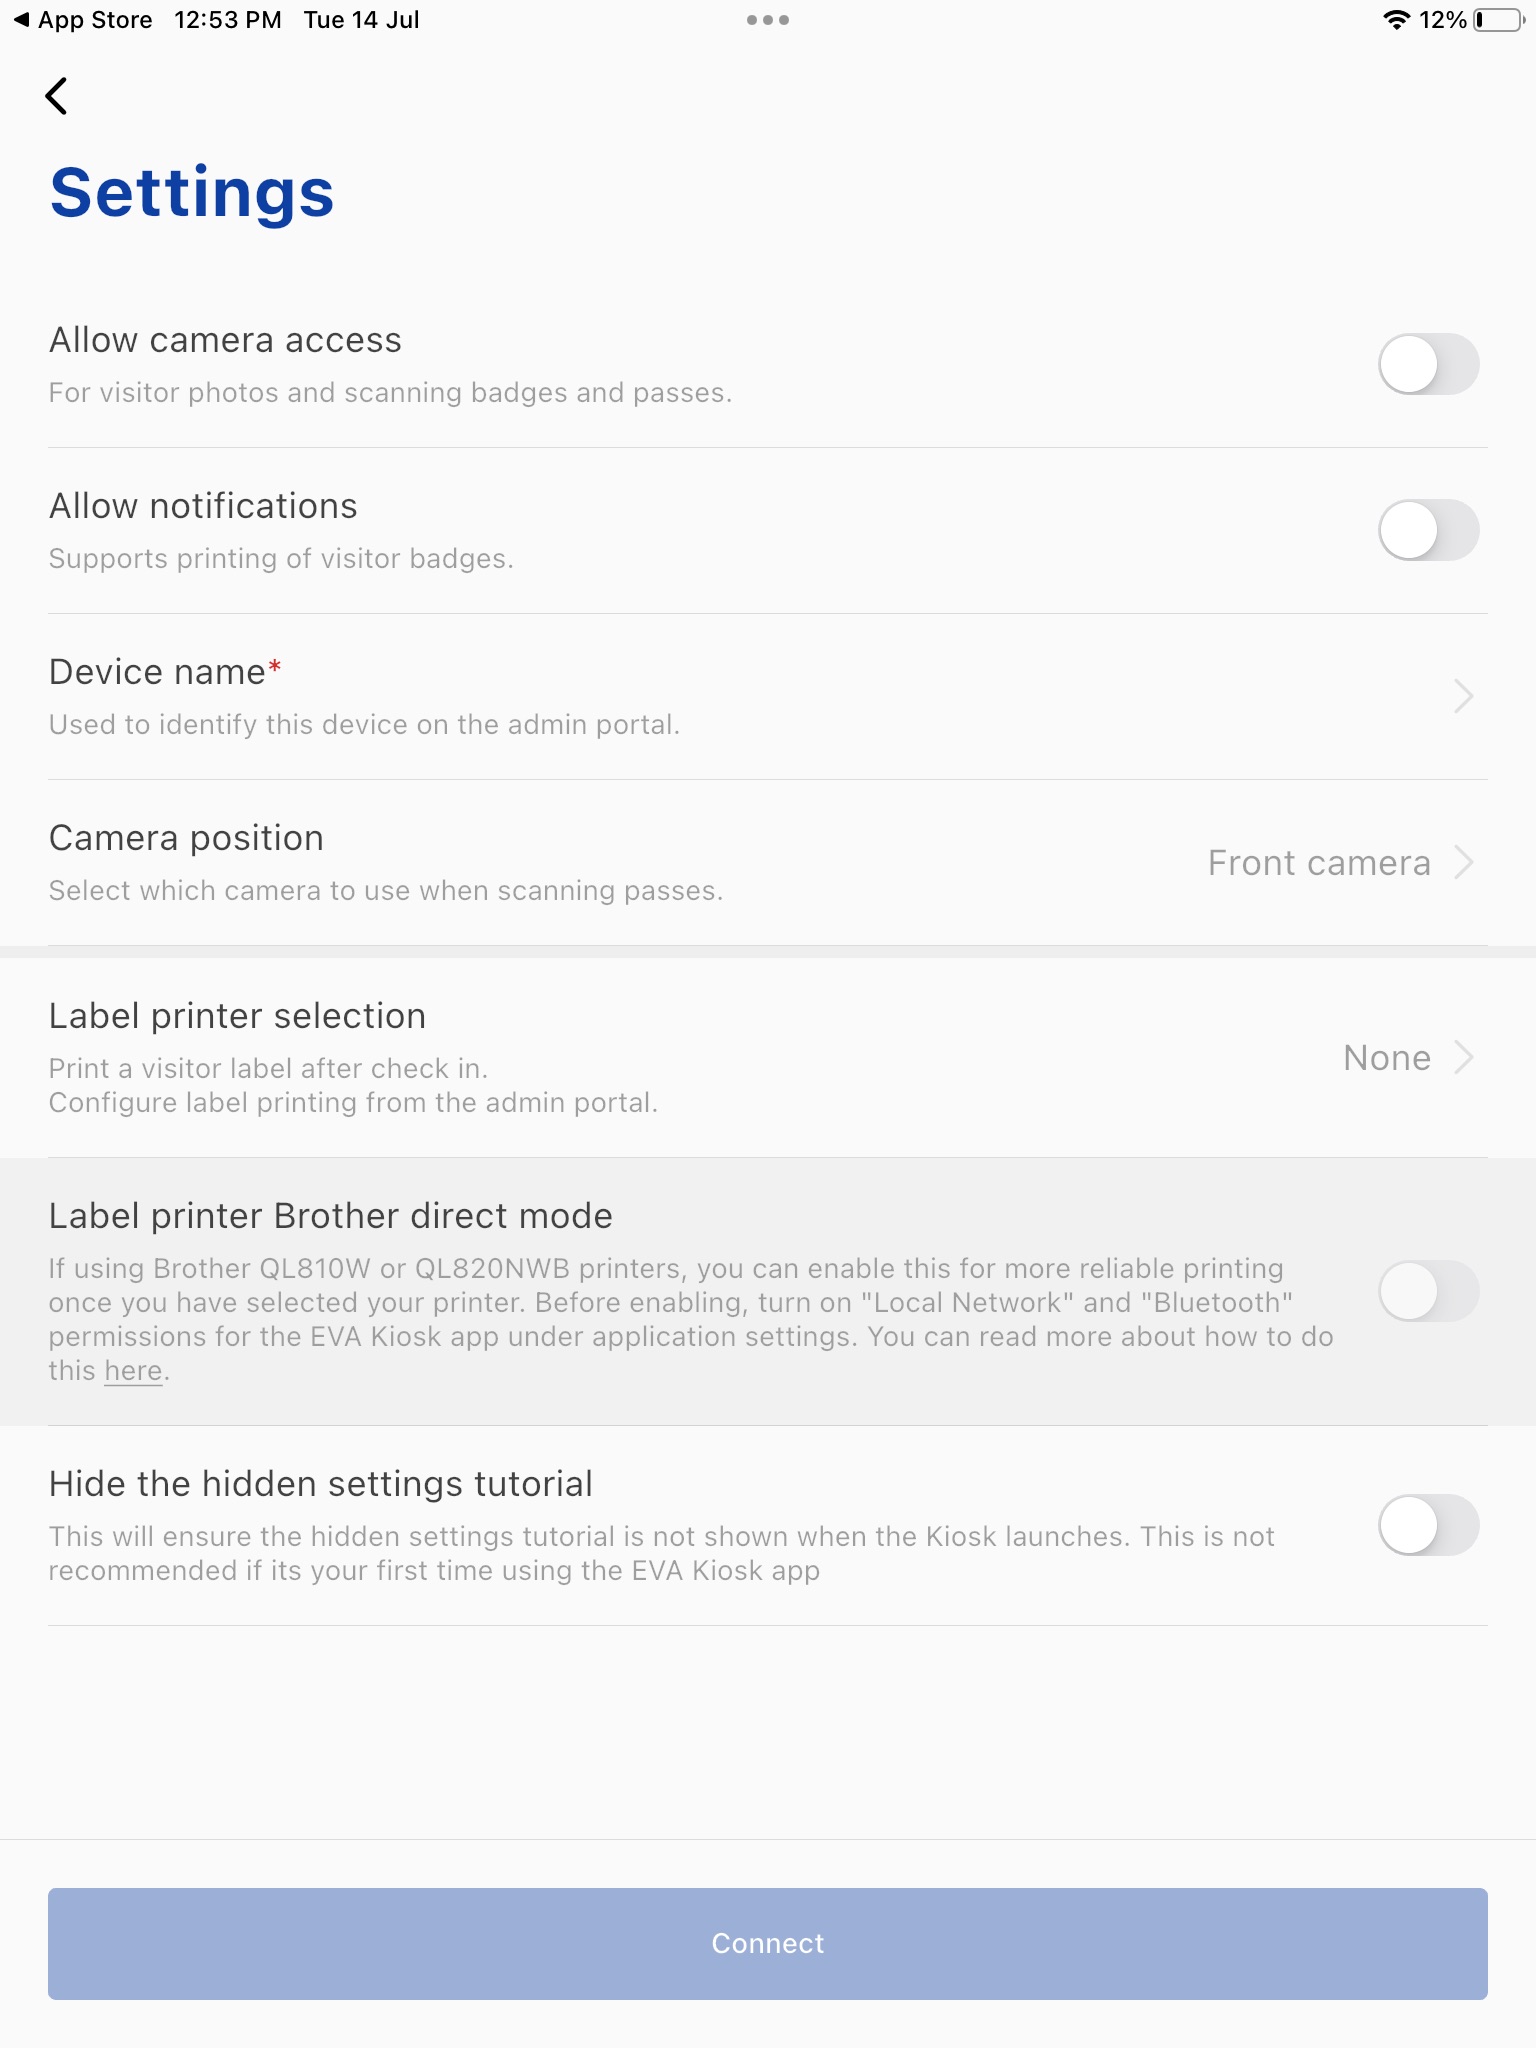
- Tap Connect
- Start Guided Access on your iPad to lock the app in place (see below)
- Your kiosk is now set up ✅
How do I turn on Guided Access?
Guided Access is an iPad accessibility feature that locks the device to a single app and lets you control which features are available while that app is open. To enable guided access:
- Go to Settings > Accessibility.
- Tap on Guided Access to enable it.
- Tap Passcode Settings, then select Set Guided Access Passcode.
- Enter a passcode and re-enter it to confirm. You can also enable Face ID or Touch ID to end a Guided Access session.
Updating your iOS kiosk app
- Go to the App Store app on your kiosk iPad.
- Tap your profile picture at the top right.
- Scroll down, then tap Update next to the EVA Check-in app, or tap Update All.
How do I set up the Kiosk app on an Android tablet?
- Make sure your device is running Android OS 10 or above.
- Download our kiosk app for Android tablets from Google Play.
- Connect the kiosk - get the ID and token by clicking the kiosk icon on the relevant check-in zone.
- Choose your kiosk device settings
- The only compulsory setting is a device name.
- Others relate to the camera (required for visitor photos, and scanning badges and passes) and label/badge printing
- Pin your screen to make it difficult for a user to leave the kiosk app. Learn how.
- Your kiosk is now set up ✅
Updating your Android kiosk app
- Open the Google Play Store app on your device
- At the top right, tap the profile icon.
- Tap Manage apps & device.
- Under “Updates available,” tap See details.
- Next to the EVA Check-in kiosk app, tap Update, or to update all your apps at the same time, tap Update all.
Kiosk branding
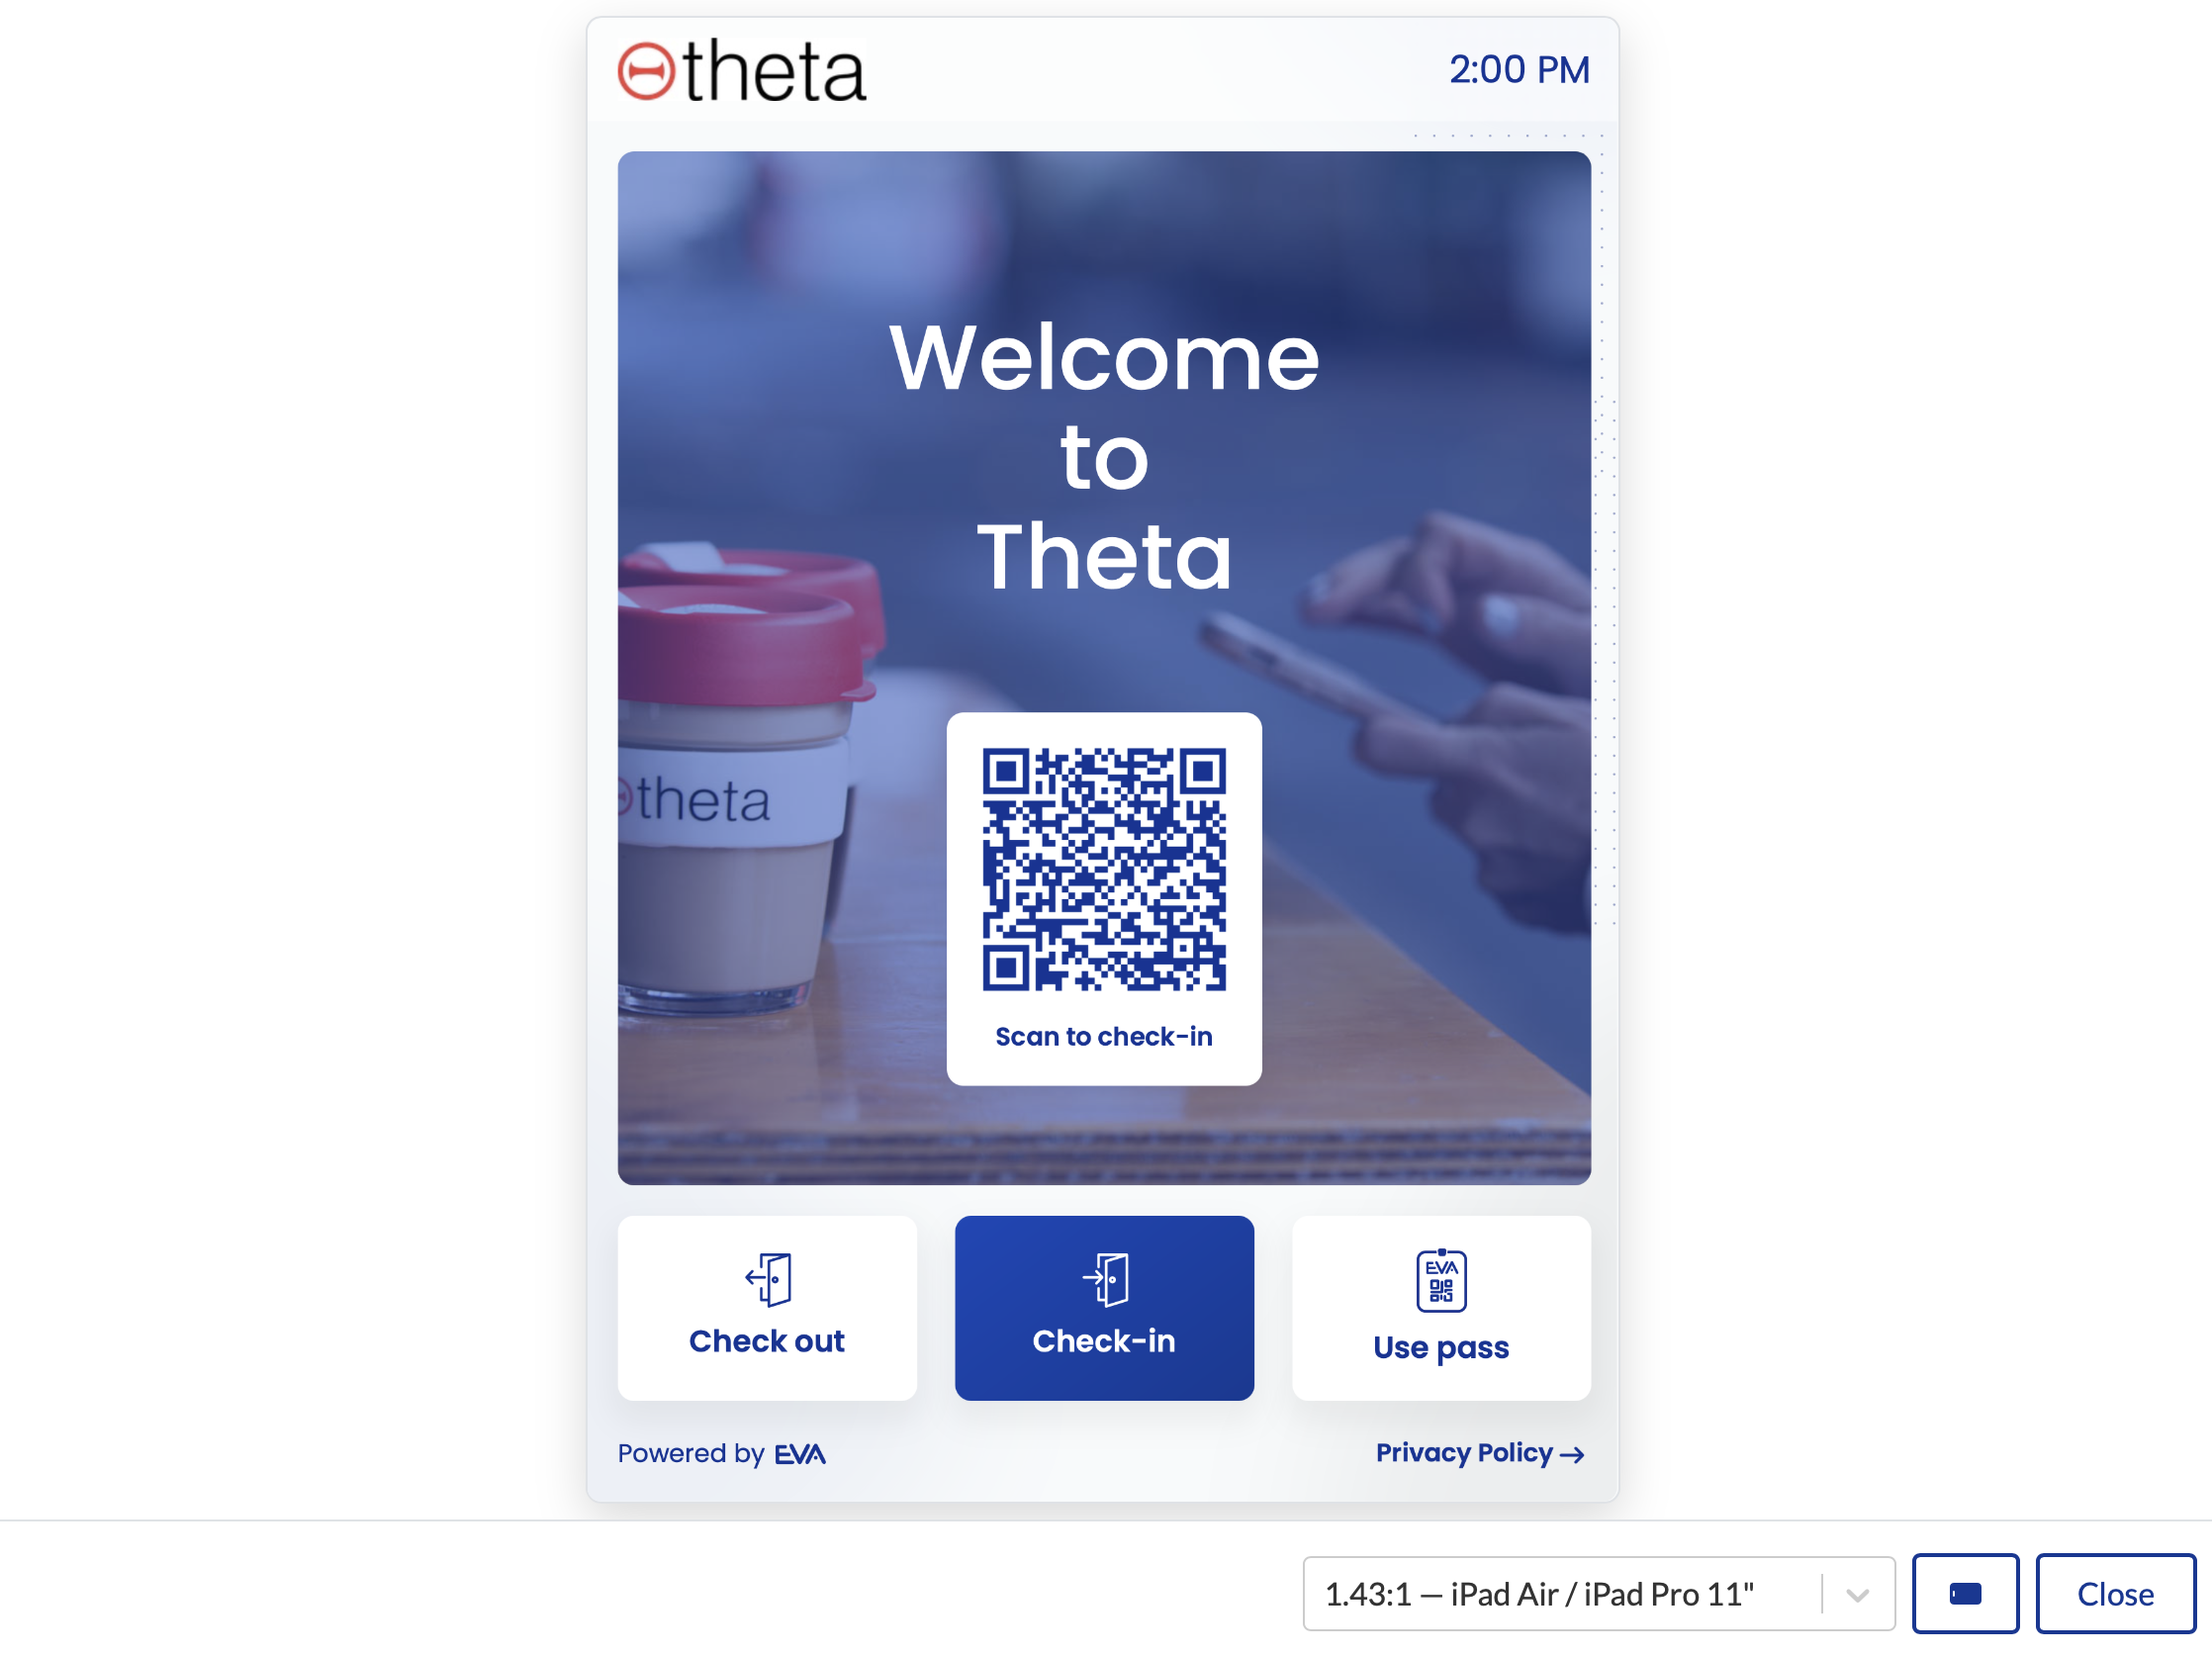
Go to the Kiosk & poster tab on Site information > Options to:
- add or review your site logo
- change your kiosk colour scheme
- add a feature image
- customise or hide the welcome text
- hide the QR code
- hide pass and/or check-out buttons
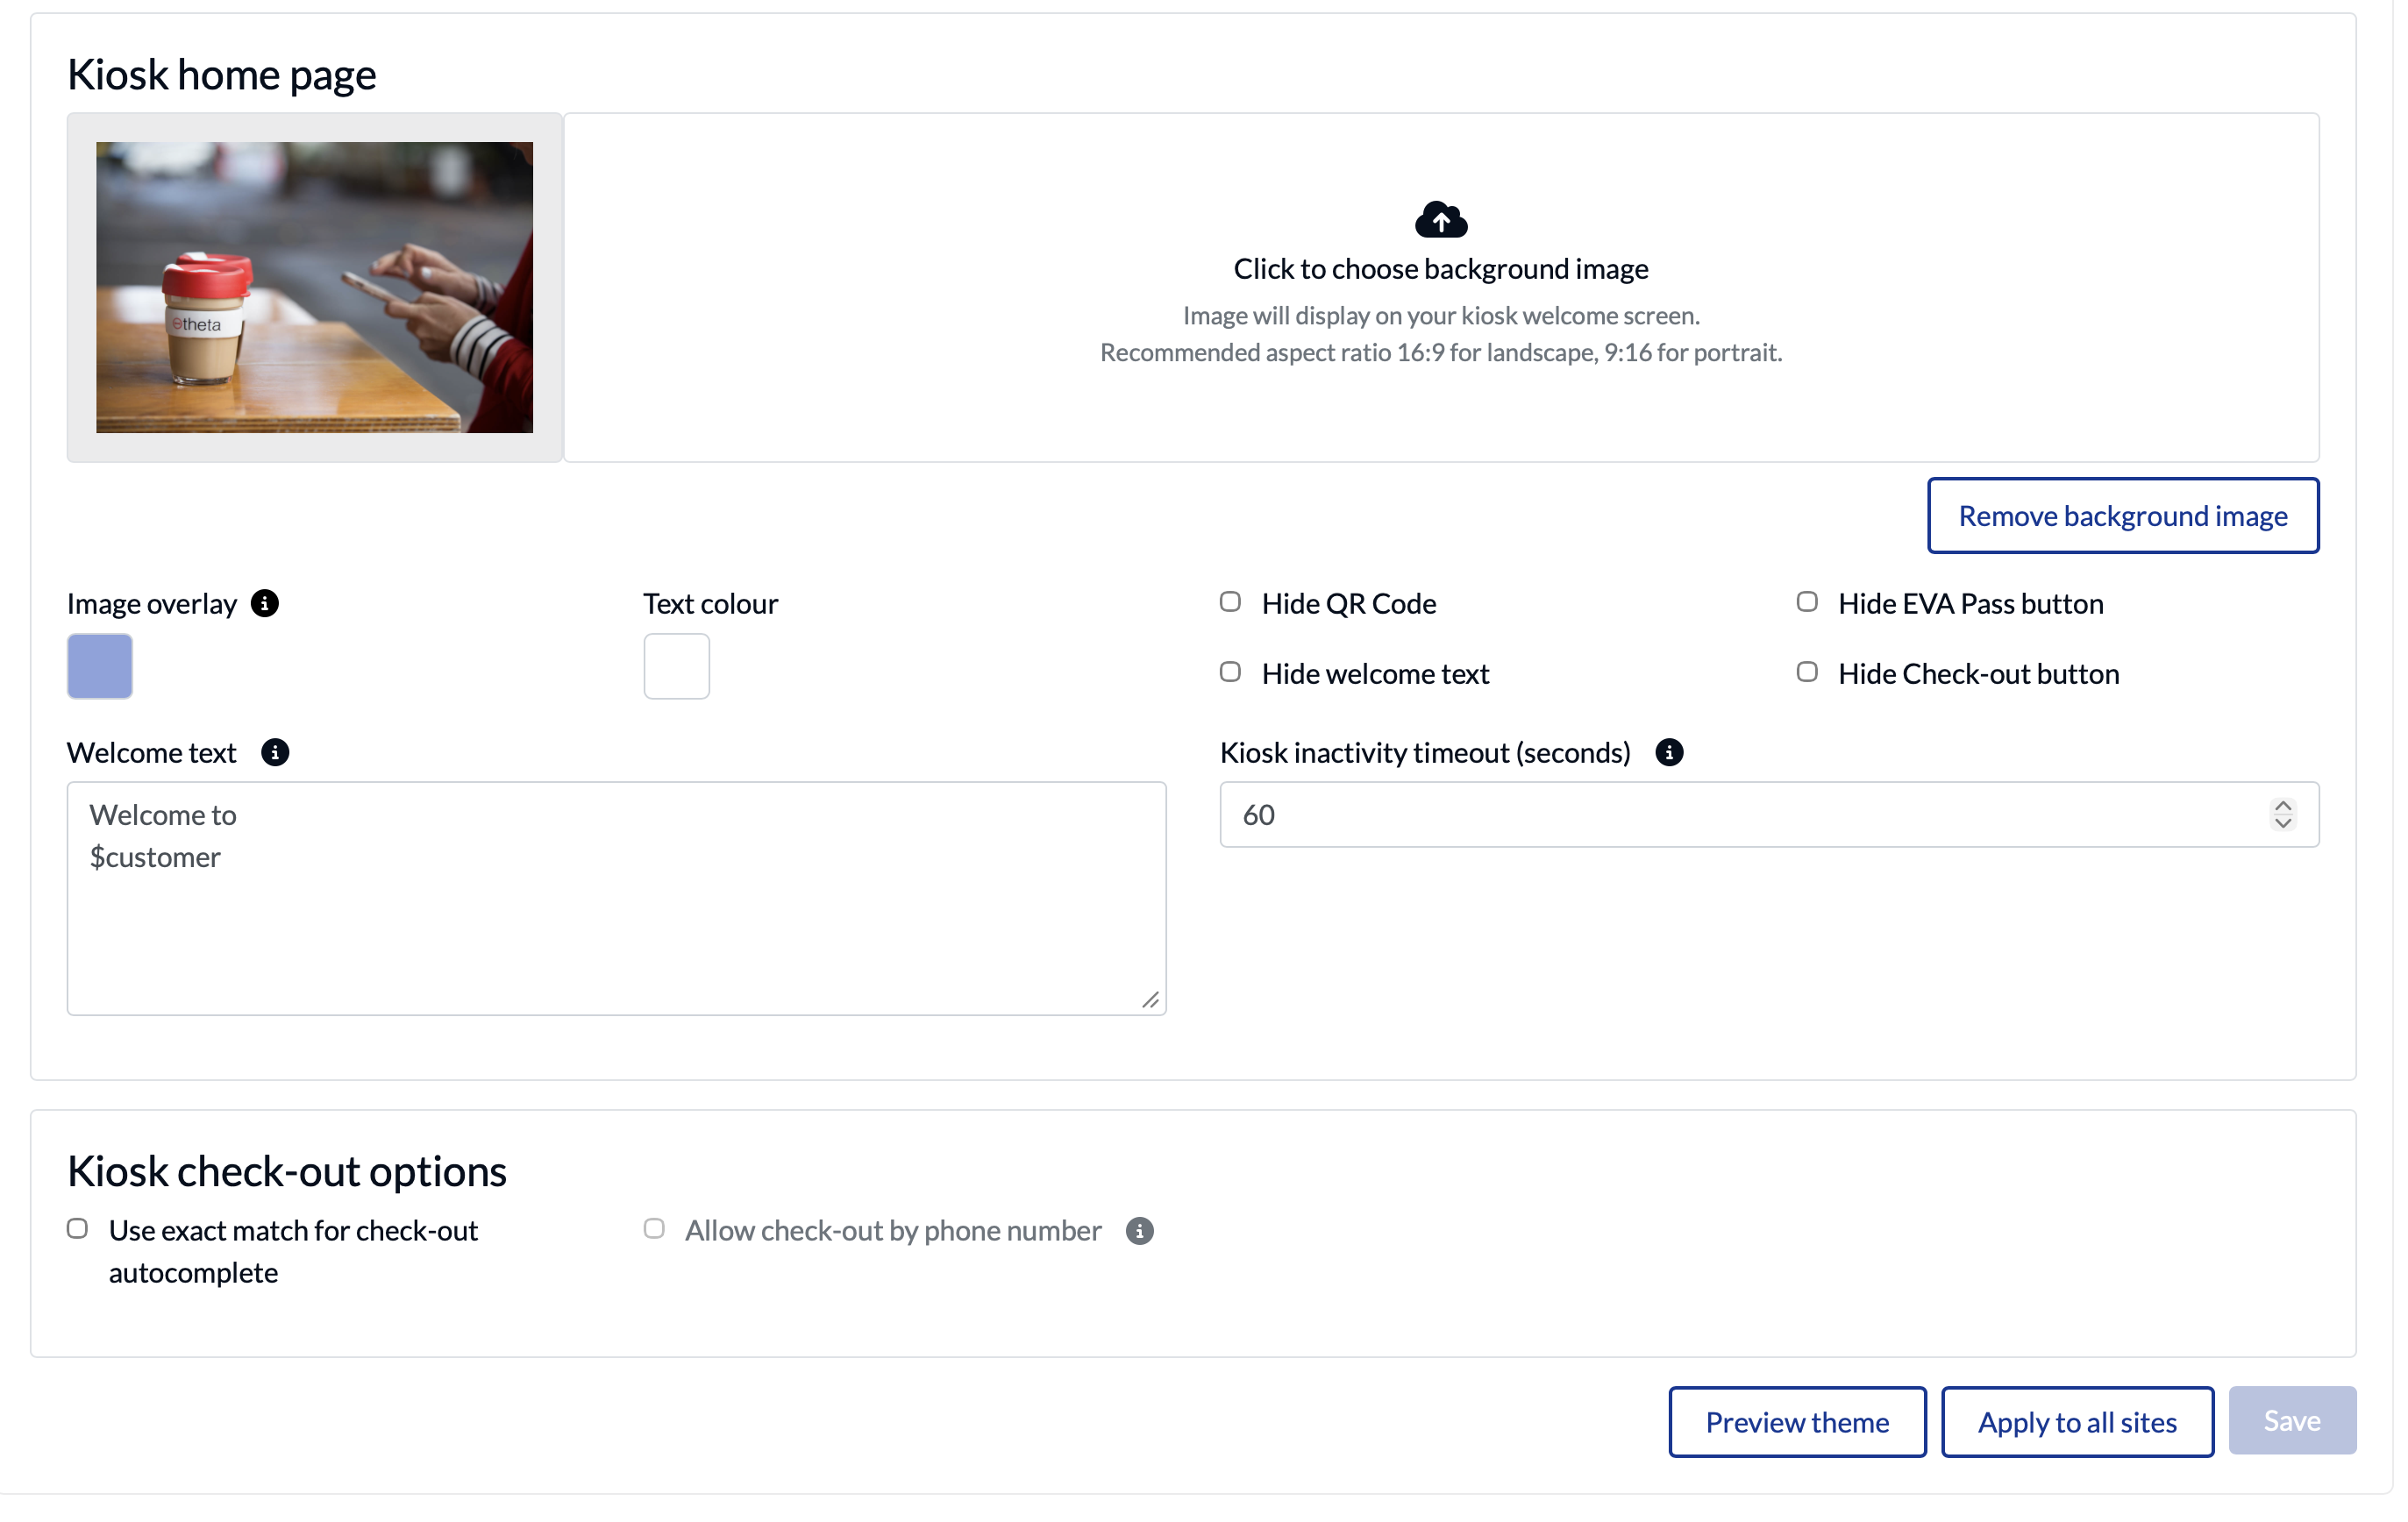
You can also preview your kiosk on different device sizes/orientations, and specify check-out options.
Other kiosk settings in the EVA Check-in portal
You can override some kiosk settings by zone.
To do this, expand the Advanced kiosk options on the zone's kiosk setup page:
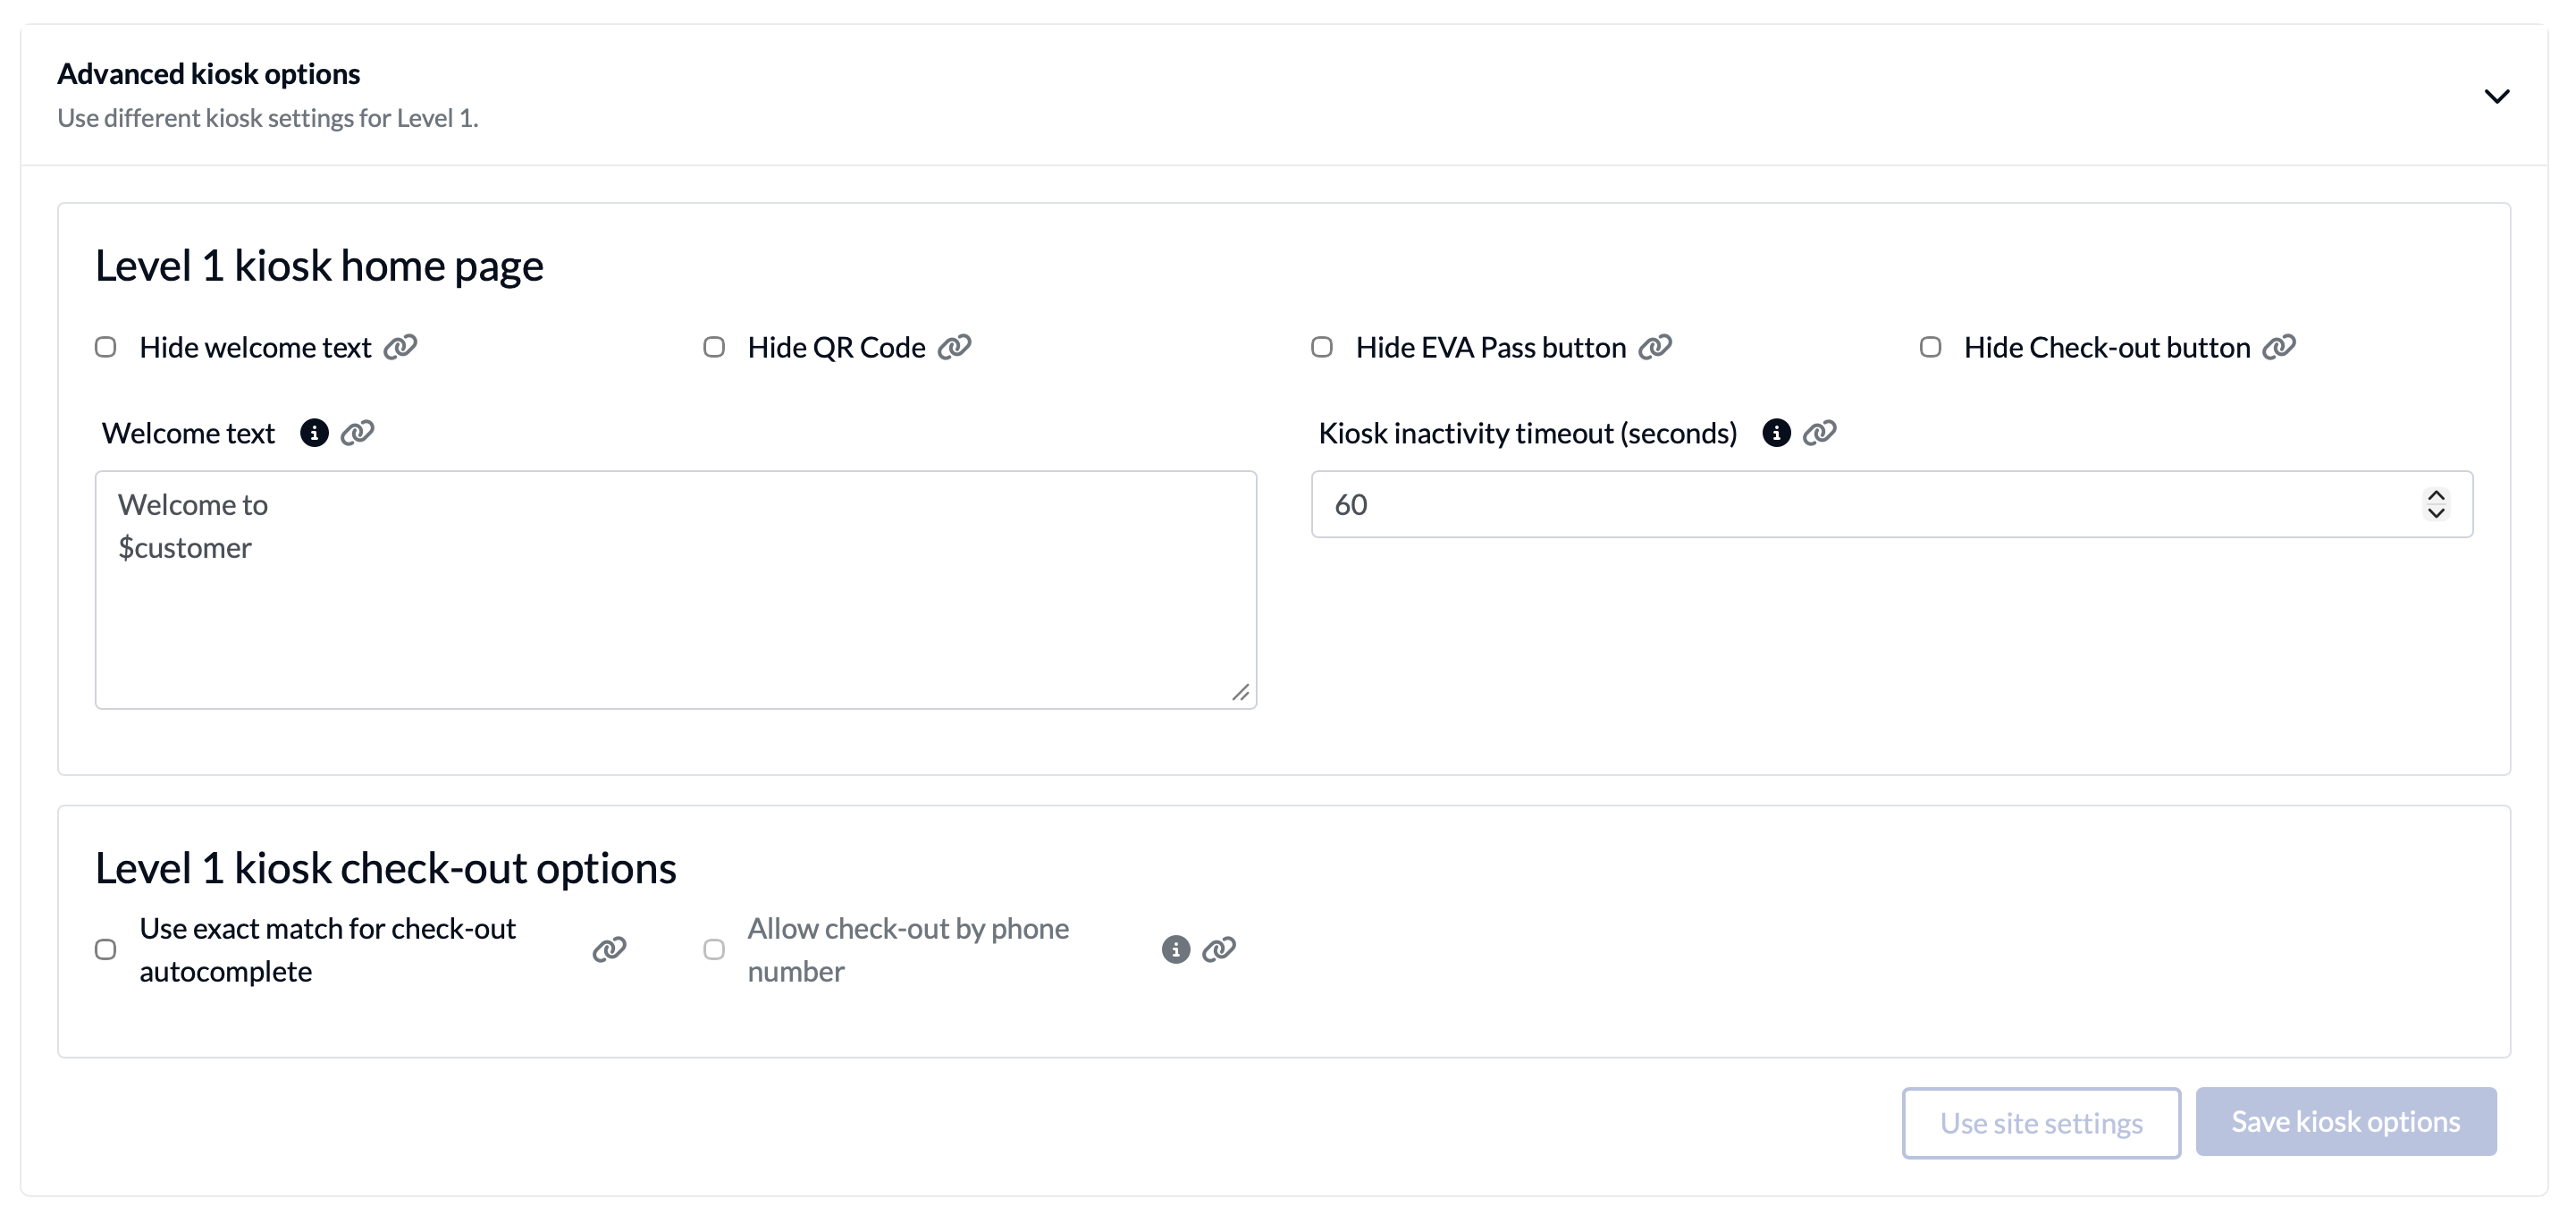
Items that show the link icon are using the site settings.
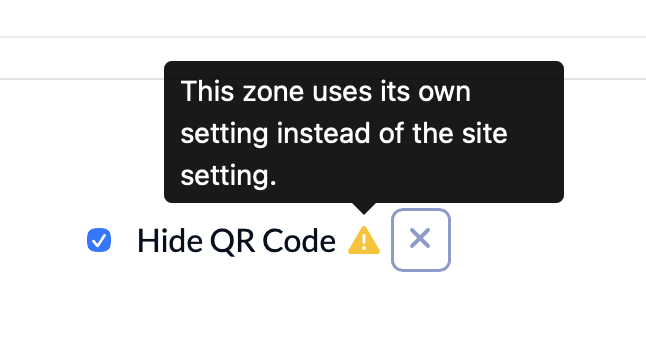
When you change an option on the zone, you'll see a warning icon, indicating that the selected setting differs from the overall site setting.
Updating kiosk device settings
To access device settings on your kiosk app, triple tap the bottom left of the screen.
Reconnect a kiosk to a different zone
If your kiosk is linked to the wrong check-in zone, or a zone that has been deleted, reconnect the kiosk using the current zone details.
Reconnect the kiosk
- Open the EVA Check-in kiosk app on your device.
- Open settings (triple tap, bottom left)
- Click Disconnect to disconnect the current kiosk connection.
- In the EVA Check-in portal, go to Check-in zones.
- Open the kiosk connection details for the correct zone.
- Enter the new kiosk ID and token in the app.
- Apply the changes and confirm the kiosk connects successfully.
If reconnecting does not work
If the kiosk still does not connect correctly:
- Remove the EVA Check-in kiosk app from the device.
- Reinstall the app.
- Reconnect it using the kiosk ID and token for the correct zone.
Tip
If you have recently deleted or renamed a zone, check that the kiosk is still connected to the correct active zone.