SOS alerts
A new SOS button allows visitors with the SOS permission to raise an alarm directly from the EVA Check-in mobile app with just one click.
This may be useful for workers in high-risk or isolated situations, and is another way EVA's working hard to make workplaces safer.
Table of Contents
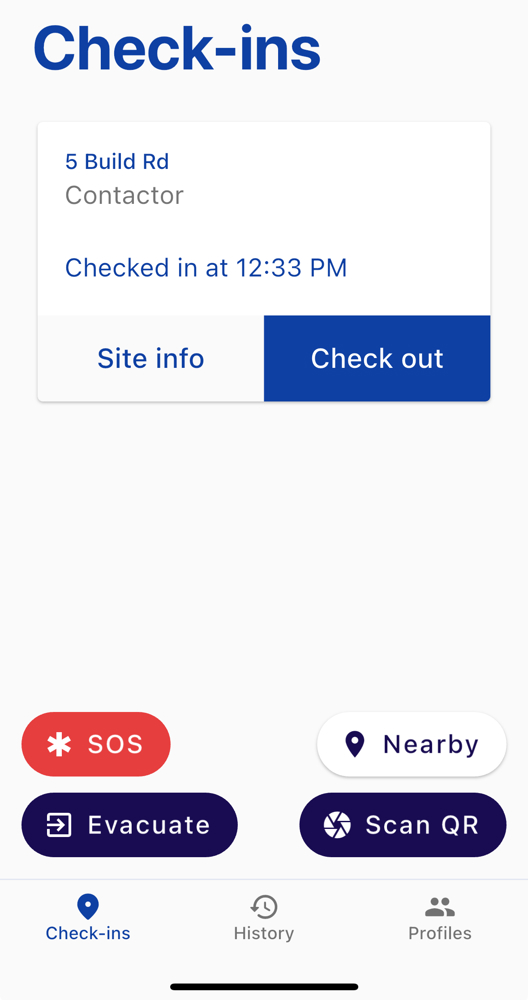
How SOS works: step-by-step overview
NOTE: The SOS feature needs to be configured in the portal and enabled for SOS users before the button is visible to mobile app users. Details below.
1. Press the SOS button to send an alert
Pressing the button immediately notifies those specified - which can be all checked in people, specific groups, or individual employees - with a pre-configured message.
Only visitors with valid contact details (email address, phone number, mobile app and/or Teams, depending on specified notification method/s) can receive this message.
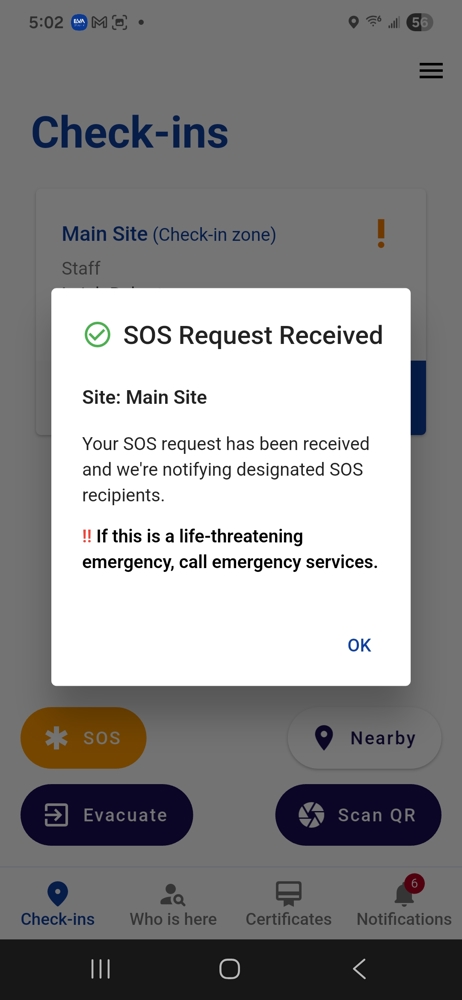
Once you click OK you have the opportunity to add more detail and update the message sent.
2. Delivery status and add extra info
After you send the SOS, you'll get an update about the delivery status of your message.
In the example below, the SOS was successfully delivered to four out five possible recipients.
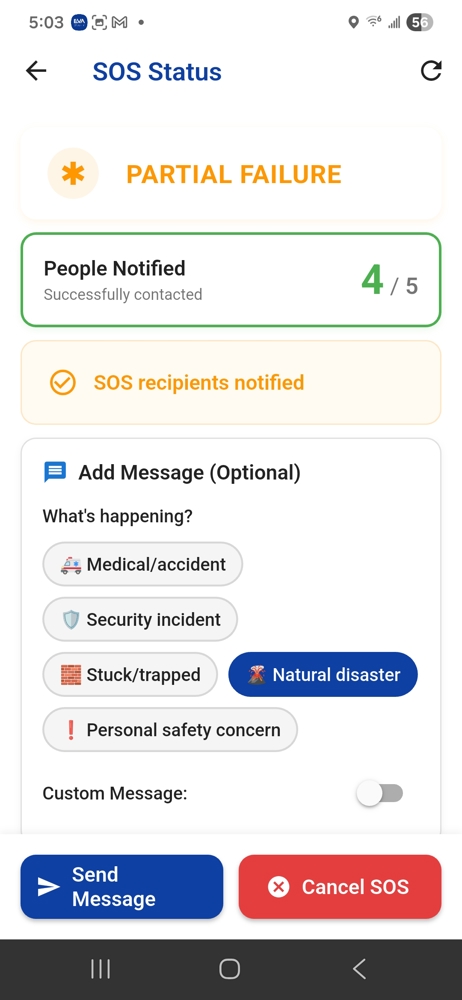
You can now optionally send an updated message to the SOS recipients. This adds more information about the SOS alarm, either using a quick button for some possible scenarios, or a custom message.
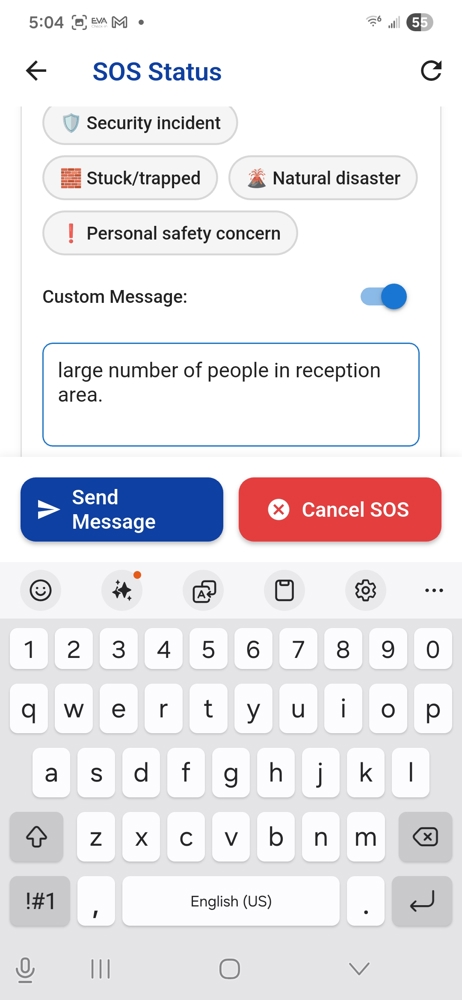
3. Once the incident is over, Cancel the alarm
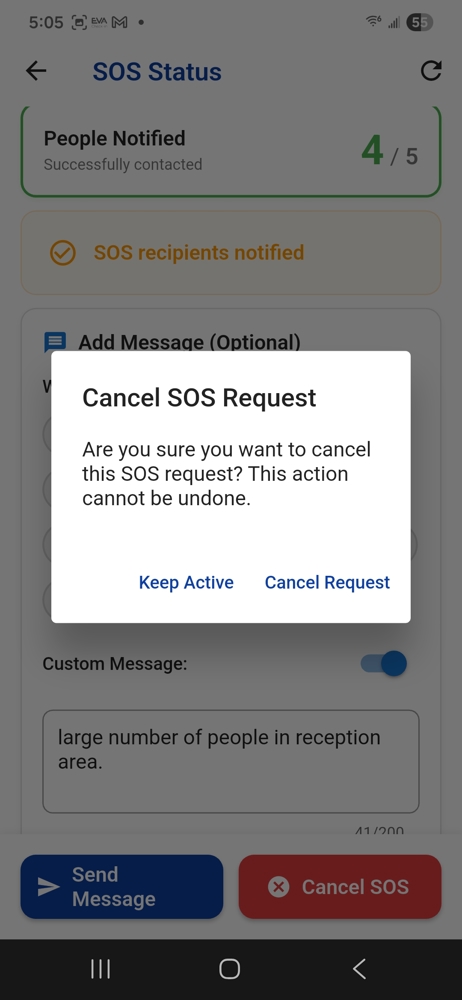
SOS recipients will receive a cancellation message.
How to set up SOS alerts
Setup your site alert methods, messages, and specific people to alert.
Go to Site information > Options. Navigate to the On-site alerts tab, where you'll see a section: SOS alerts.
1. Alert method
Select your preferred combination of SMS, email, push and Teams notifications for alerting people in the event of an SOS.
If the method includes "as backup", this channel will be used if the first fails or is unavailable. For example if a person hasn't entered a phone number, then SMS can't be used, but email or push (through the EVA Check-In app) could be used.
2. Alert recipients
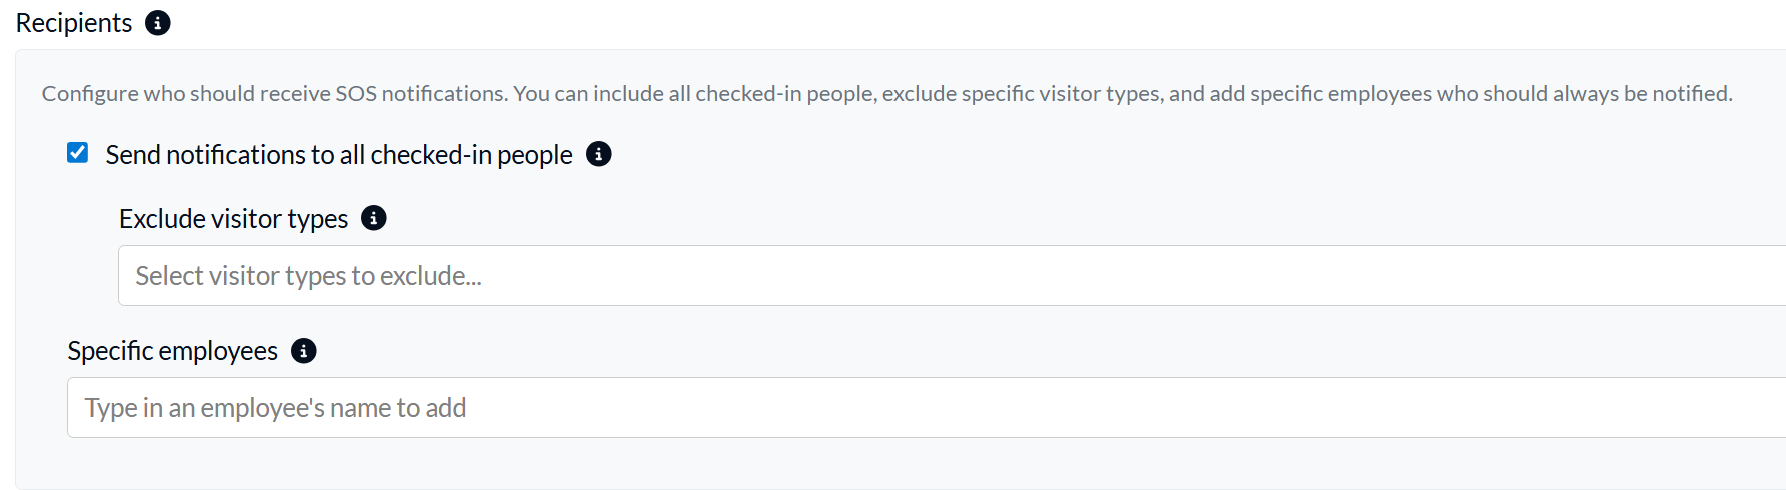
You can choose to :
- send alerts to all checked-in people
- exclude specific visitor types (e.g. you may wish to exclude visitors / only send to staff)
- send to specific (named) employees (even if they are not checked in)
3. Alert content
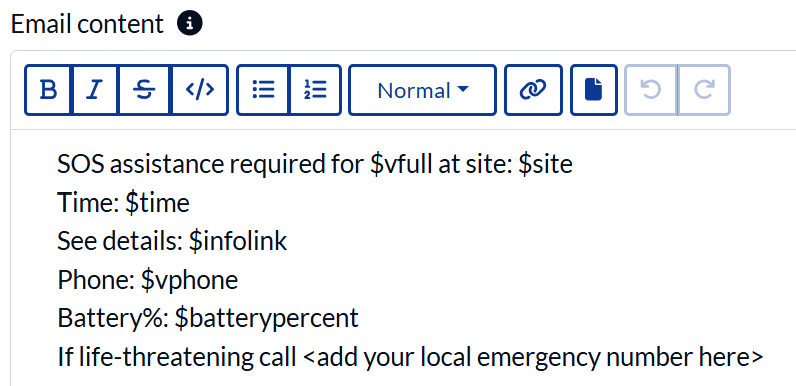
You can send different messages depending on the channel - e.g. a shorter message for SMS, and a more detailed message via email. For example:
Replacement variables
You can find descriptions of the variabled like $vfull in the tool tip for the content.

$vfirst— visitor’s first name$vlast— visitor’s last name$vfull— visitor’s full name$vphone— visitor’s phone number$site— site name$time— current time$infolink— SOS details link$batterypercent— battery percentage
⚠️ Remember to Save the settings!
Enable SOS for individuals or visitor types
Prerequisites: visitor profile & mobile app
- A visitor must have checked in to a site in your organisation. Once they have done this they will have a visitor profile.
- You can check this via Overview > Visitor profiles
- No visitor profile? You can ask the person to check in, use manual check in to check them in, or complete a pre-registration for them.
- To use the special permissions, they must also be using the latest version of the EVA Check-in mobile app, as that's where the button appears.
Grant permission
In the EVA Check-in portal, grant the user the SOS Initiation permission via their visitor profile. This can be granted on all sites or just on specific sites.
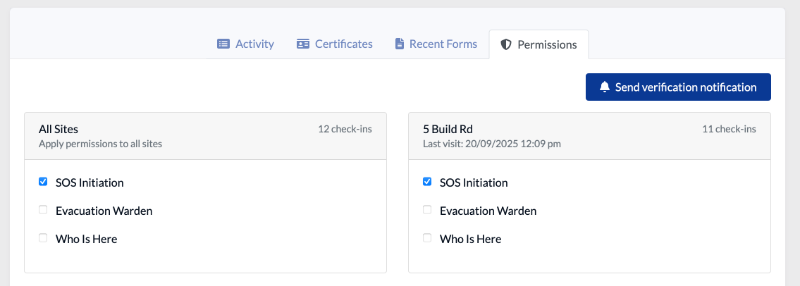
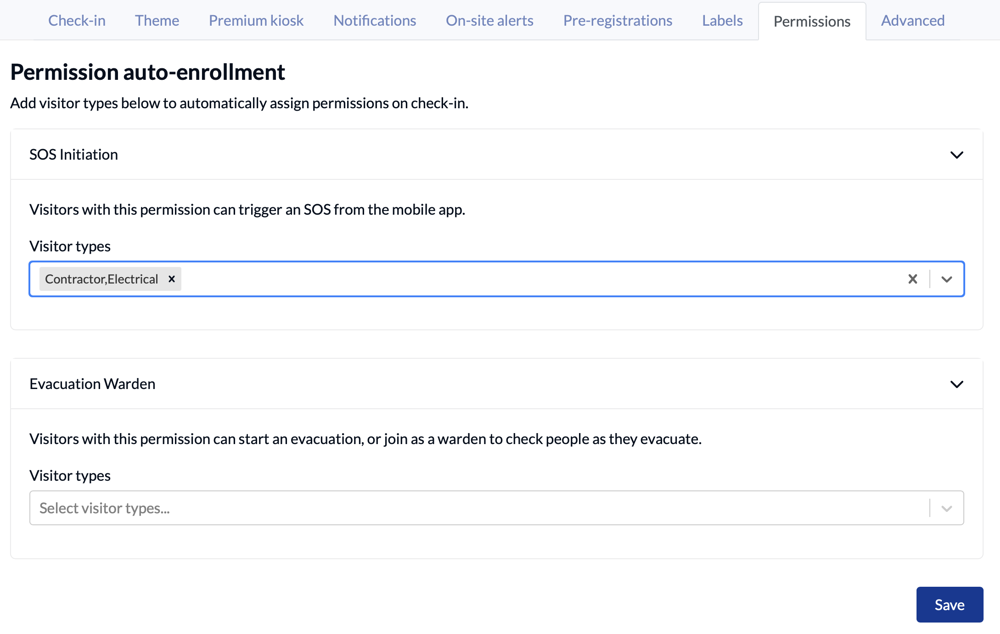
If you prefer, you can automatically assign permissions by visitor type. For example, you may want all of your electrical contractors to be able to trigger an SOS from the mobile app.
To do this:
- Go to Site information > Options > Permissions
- Select the visitor type you would like to automatically grant permission to
- Click Save
Device verification
Users will also need to verify their device.
Our Authenticated visitors article details this process.
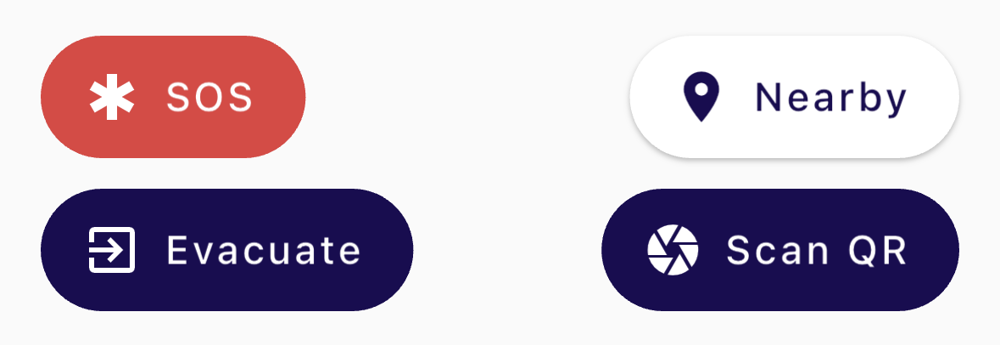
Once they have verified their device they will see the SOS button on the EVA Check-In app.
Roll-out tips
We recommend trying this feature with a small group of users before wider roll-out. This might be your health and safety team, for example.
Pilot group
- Select a pilot group of users to send/receive SOS alerts
- Set those users up with SOS permission
- Use the "Specific employees" field to specify a small group (e.g. the same pilot group) who will receive SOS alerts
- Support and train this group to:
- authenticate their device so they can see the SOS button
- initiate an SOS
- respond to an SOS
- Run a drill with this pilot group. We also recommend testing SOS initiation in different site locations - cell coverage is required for SOS to work
Review, refine, document
- Based on your pilot outcomes, review and refine your processes and setup for SOS situations
- Note any locations where SOS doesn't work
- Decide who is granted the SOS permission, and who will receive alerts
- Document your organisation's SOS process and guidelines for staff
Roll-out
- Deliver SOS training as part of your organisation's health and safety training. This might include:
- Getting set up for SOS
- When to raise an SOS
- How to respond to an SOS
- Include SOS drills as part of your health and safety programme
- Include SOS info in your onboarding materials
Get SOS alerts
Contact us if you would like to enable SOS alerts on your sites.